People do all kinds of things for self-care. For some it may be a breathing practice, or taking long baths, or meditating. I find it nearly impossible to clear my mind and be in the moment while also being still—I need to keep my hands busy. This usually means crafting.
Consider introducing your students to this crafty form of self-care. It may turn out to be a source of joy and comfort for them for years to come. And it can make your classroom a brighter place right now.
Some general guidelines about crafting as a form of self-care – whether for yourself or your students:
1. Take off the pressure. While it’s satisfying to learn a new skill, it’s okay if you or your students have no desire to become experts in a type of craft. It can be about play and joy, not about the finished product.
2. Short periods of time are valuable. If you can only set aside ten minutes a day, that’s fine! Having even a small amount of time and space to disconnect from everything else going on in the classroom (and the world) to just be in the moment can go a long way.
3. It’s okay if you’re not feeling creative. I have heard so many people claim that they’re not creative. That doesn’t necessarily mean that art and crafting can’t be enjoyable! If you’re not feeling inventive, use patterns and templates and let your creativity come through in other ways. There are countless ways to create.
4. Consider making something that you can enjoy as a community. Create something together that will brighten up your classroom as the year goes on. Consider:
- Decorated construction paper garlands to drape around your classroom
- Paper stars that students decorate to hang from the ceiling
- Origami creations to display on classroom shelves
- Paintings or drawings to display on a gallery wall in your classroom
Students can also create items for their own enjoyment – from knitted scarves to beaded necklaces.
Here’s one idea that you can apply to a whole array of crafts, and it can be an ongoing project.
 Temperature Craft Project
Decide on a craft project or projects that students can work on either individually or as a collective effort – using supplies you can get access to (construction paper, markers, glue, perhaps beads and yarn in various colors).
Set a time each week, or several times each week, when students will have at least 15 minutes to work on their craft project.
Step 1: Choose your projects! I have a couple of suggestions below. Also choose a time frame. Are you going to do this for a week? A month? Three months?
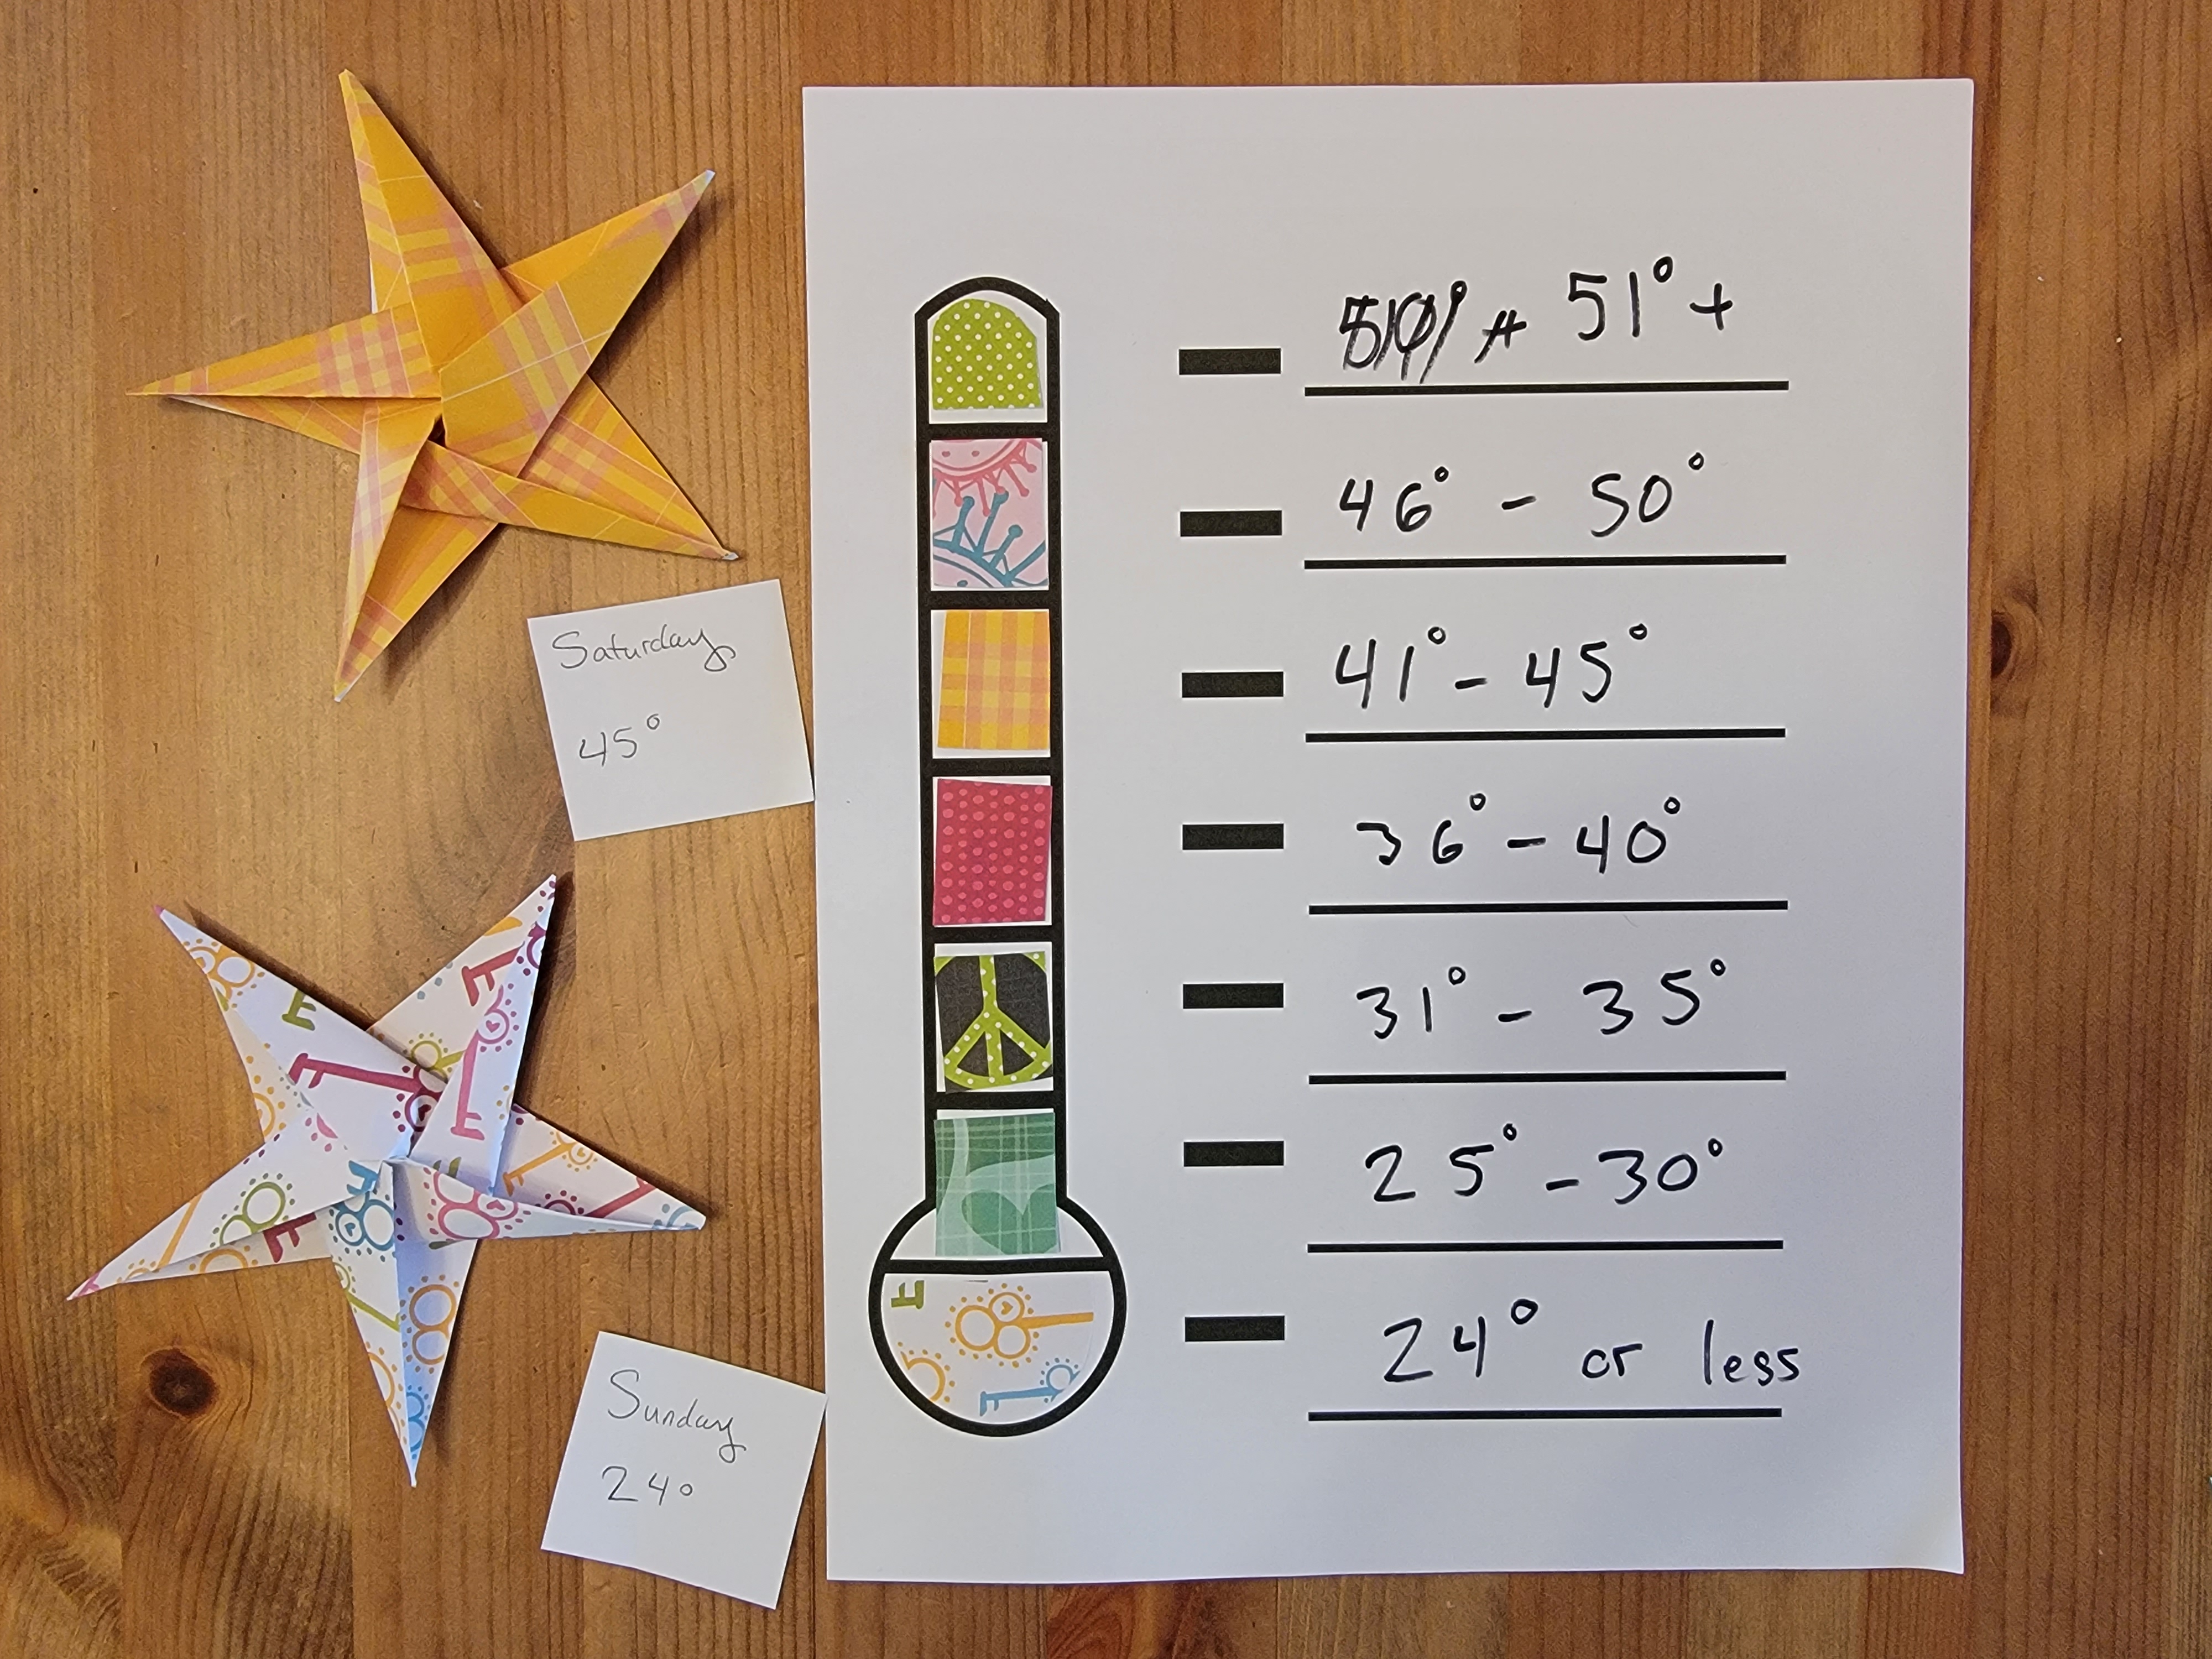
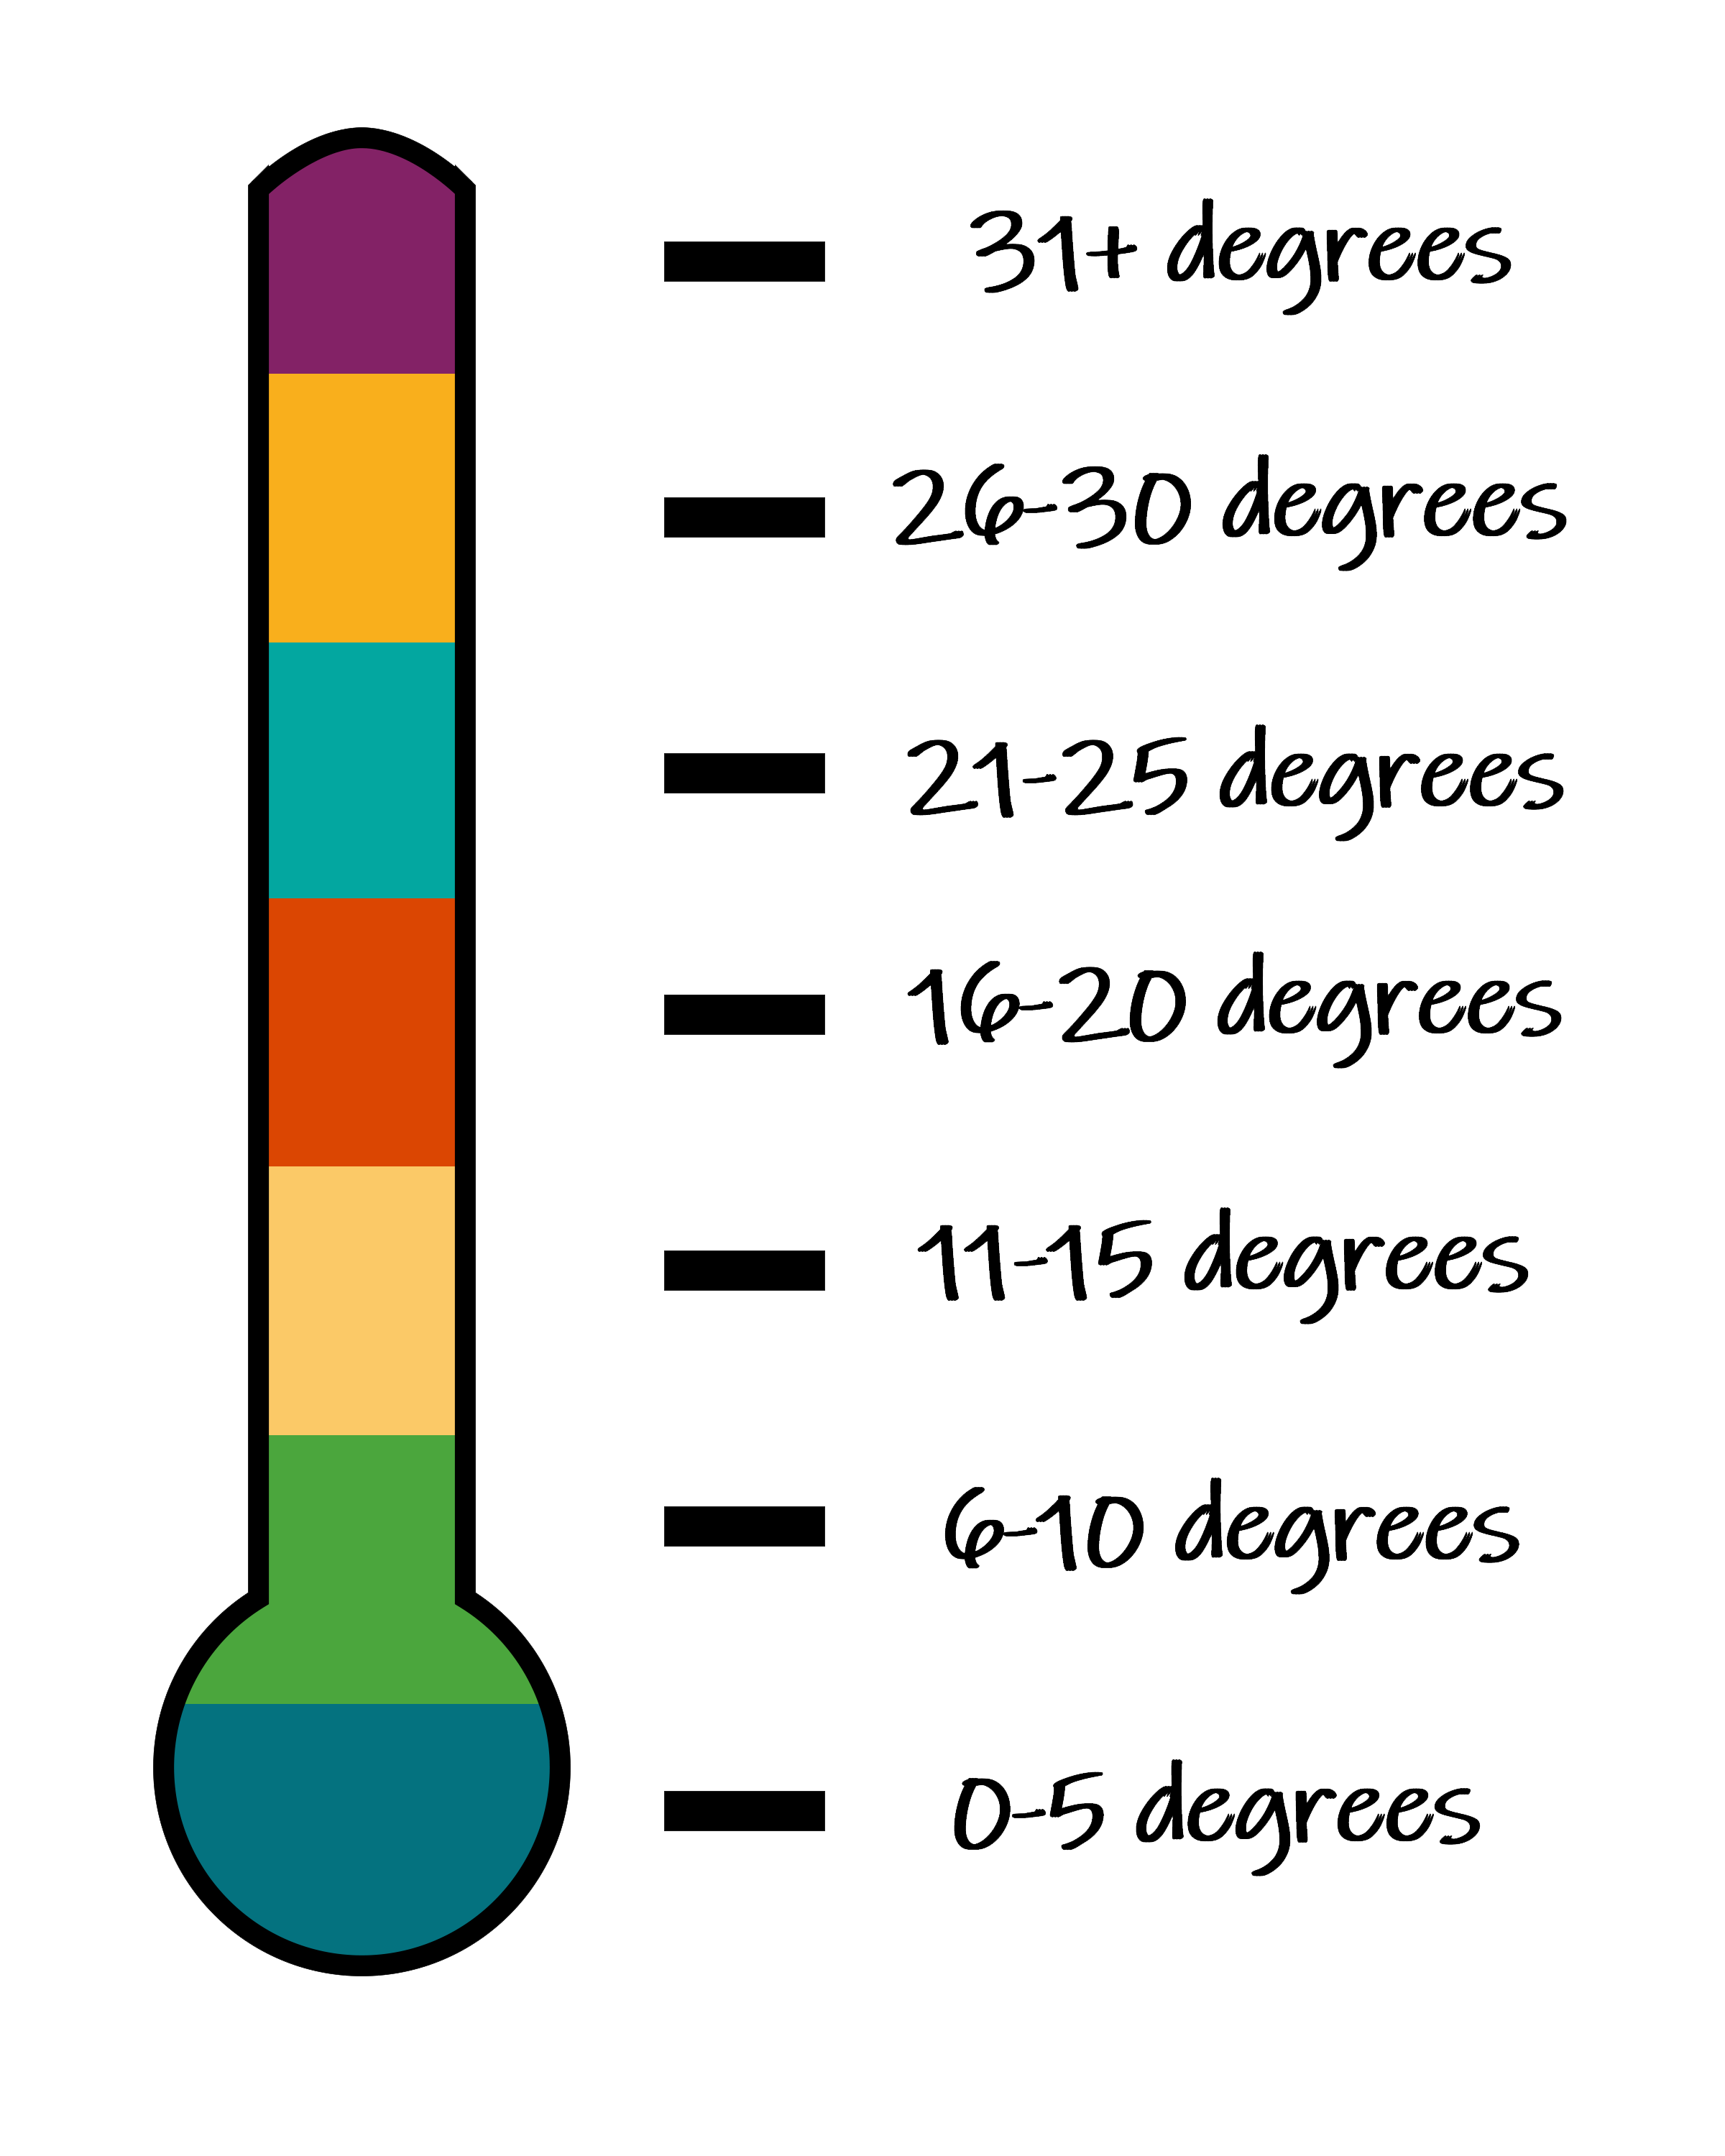
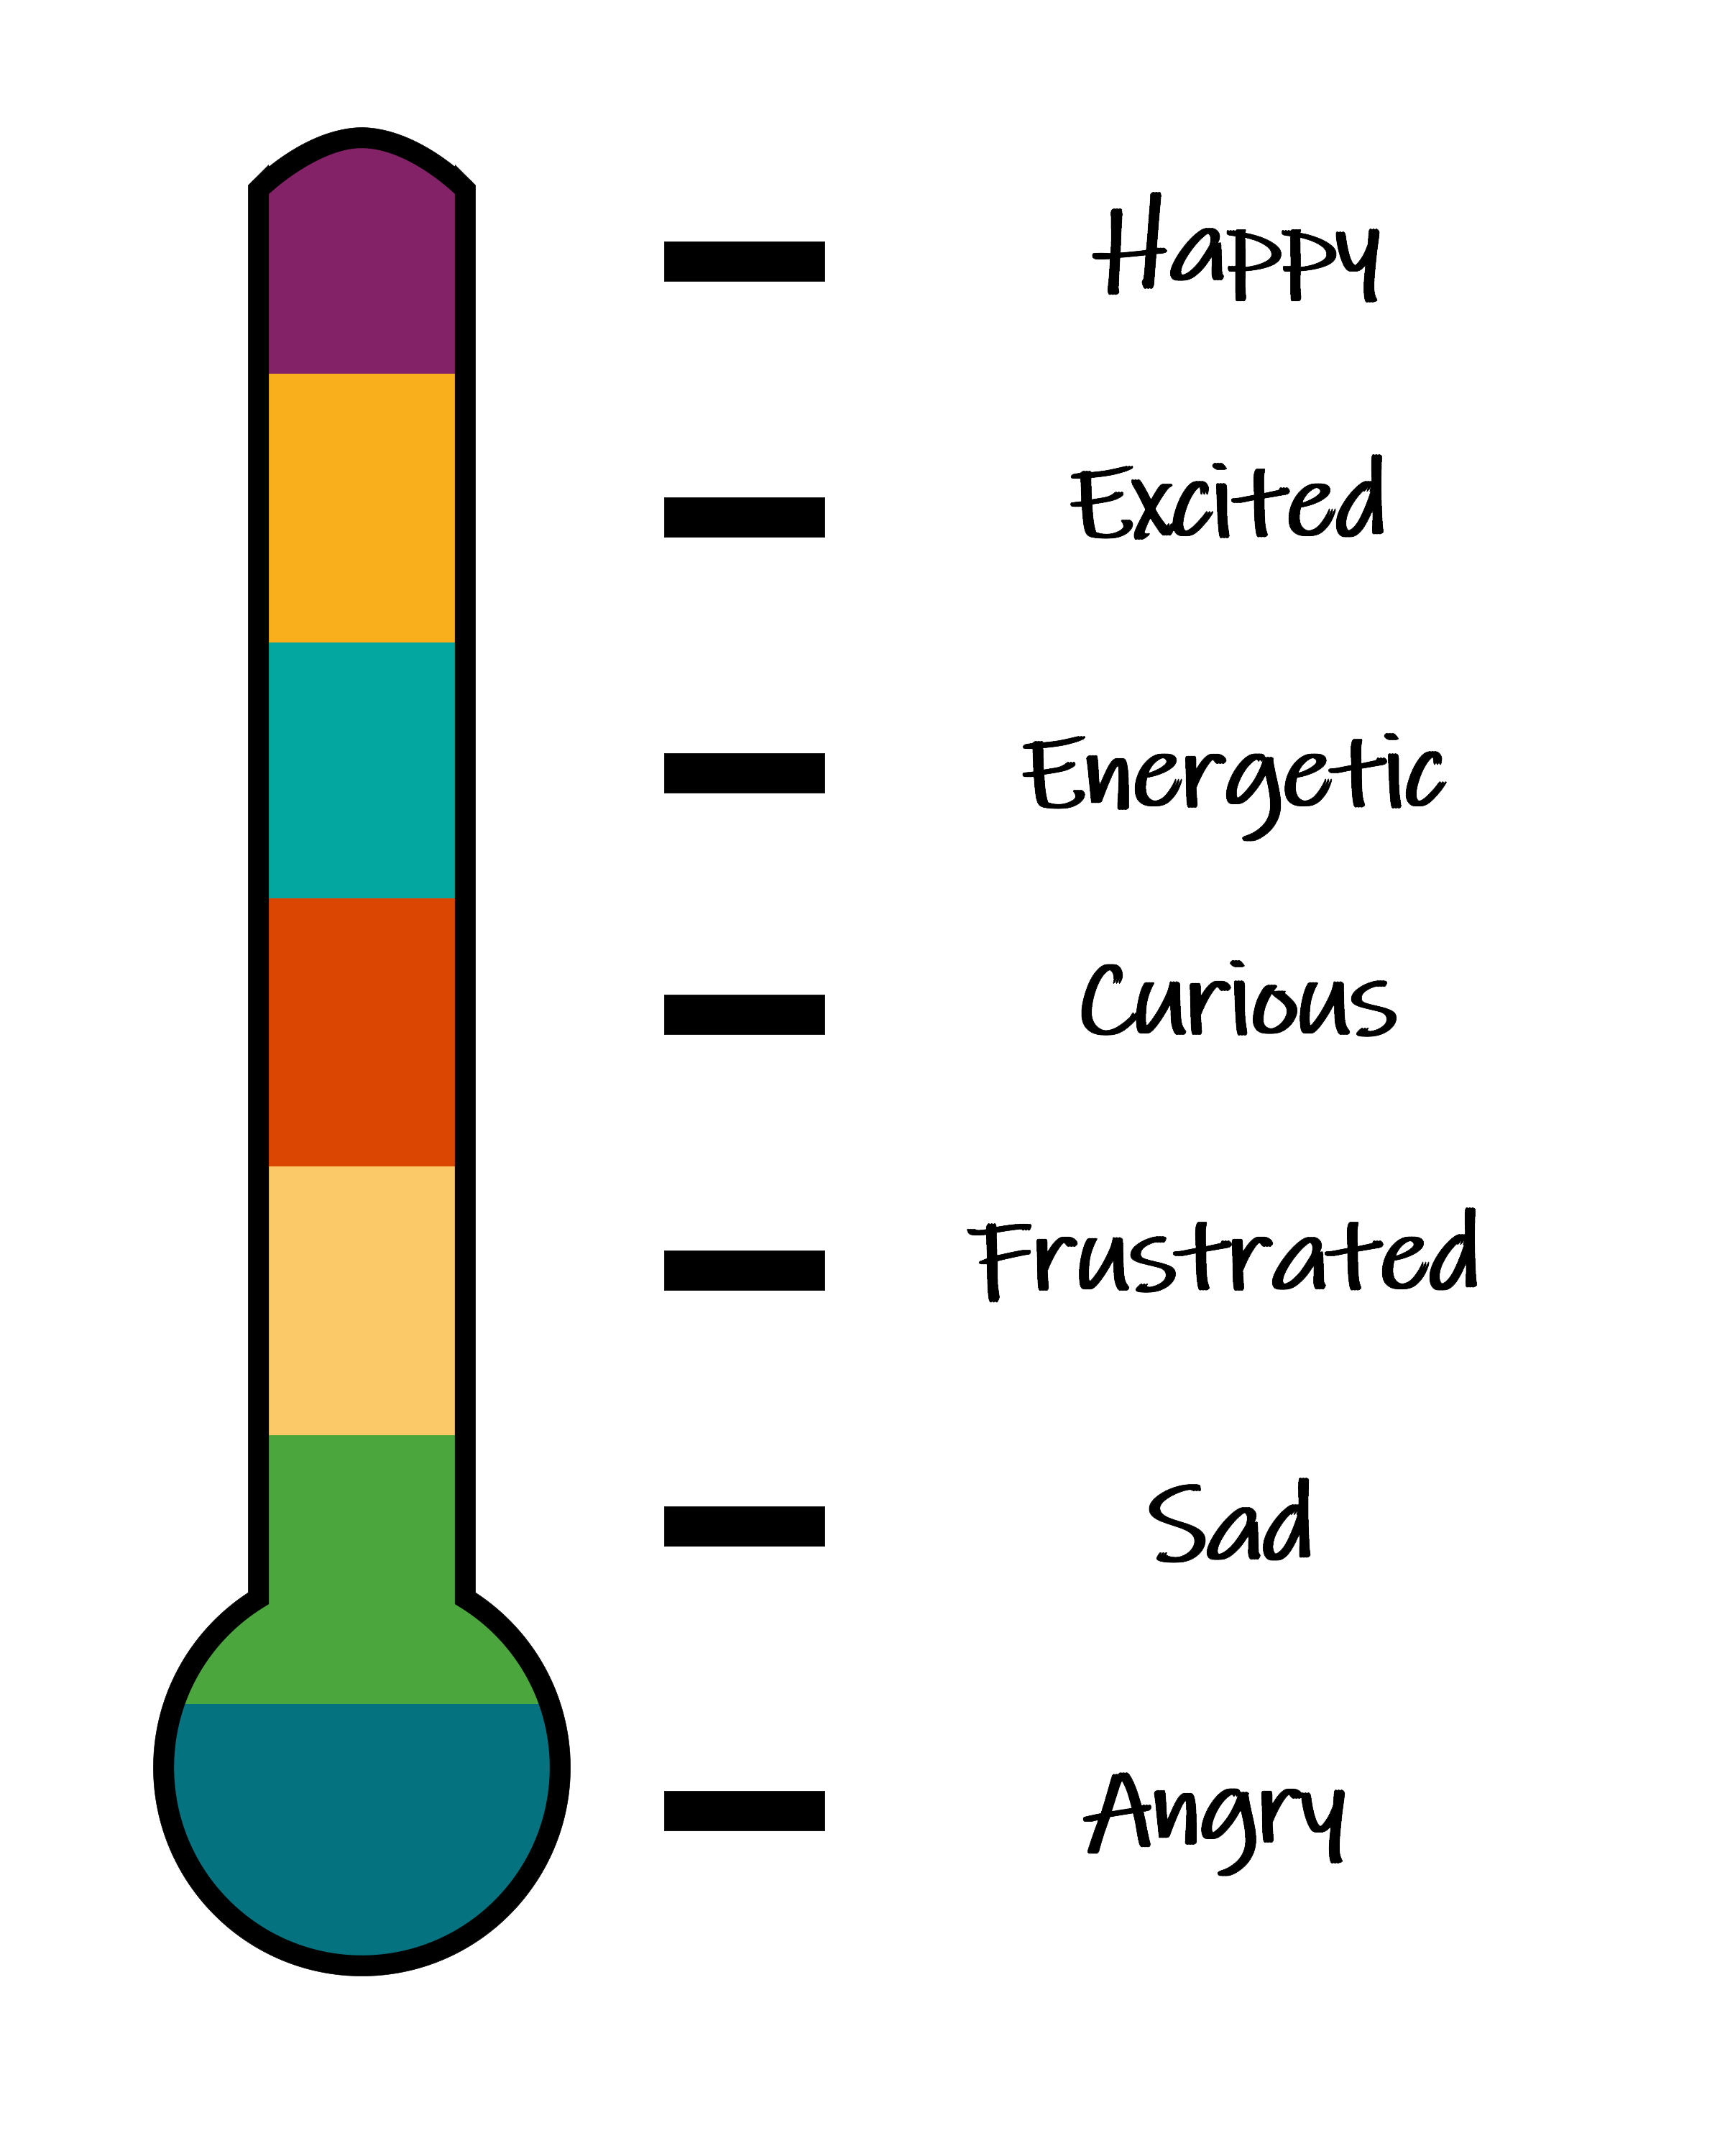
Step 2: Draw a blank thermometer or use one of these. As a class, you can fill in degrees that will be likely in your area for the span of your project.
Step 3: Distribute blank thermometers to the class (or have them draw their own). Each student can decide what colors they want to represent each temperature range, and fill in their thermometer accordingly, using markers or whatever coloring supplies you have. If you have colorful paper or other collage materials on hand, you can glue them to the thermometer instead of coloring it in. Older students may want to incorporate more colors, maybe representing every 2-3 degrees.
Step 4: Start the project! In each craft session, check the day’s temperature. No matter what collective or individual project students are working on, they’ll be using the day’s temperature (or temperature range) to determine the color of their work that day.
If the work is fiber arts, someone might knit or crochet 2-3 rows of a blanket each day, with a color that represents the temperature outside that day. Or, apply the color code to a collage, a series of drawings, a bracelet with 2 beads added each day, origami, or a construction paper garland.
This type of project could go on for a week, a month, a year – and it will enable you and your students to sit down and focus on a craft while skipping the need to figure out what to make.
 Mood Thermometer Project
For a social and emotional learning twist, take the same concept but use a mood thermometer instead.
Brainstorm feelings words as a class, and introduce the mood thermometer to them.
Give each student a blank thermometer, and invite them to fill in for themselves a range of emotions and colors they associate with each emotion. Maybe for them, joy is yellow, excited is purple, and gloomy is green. Invite students to go beyond “happy” and “sad” to consider a wider range of emotions and feelings words.
Consider having students share the words and colors they’ve chosen. It can be a chance to practice emotions language in your classroom, and explore different aspects of feelings. It can also provide insight into how your students (and you!) are feeling over a period of time.
During each craft session, each student can assess how they’re feeling that day, and work with the color, or range of colors, associated with that feeling on their personal mood thermometer. And on days when they’re feeling more than one thing, that’s fine. You may want to decide on a class how many emotions can be incorporated each day.
For older students, you can dig deeper into each emotion and create thermometers with more words and colors in the mix. Go beyond “happy” and examine if that happiness is feeling optimistic, valued, or maybe proud.
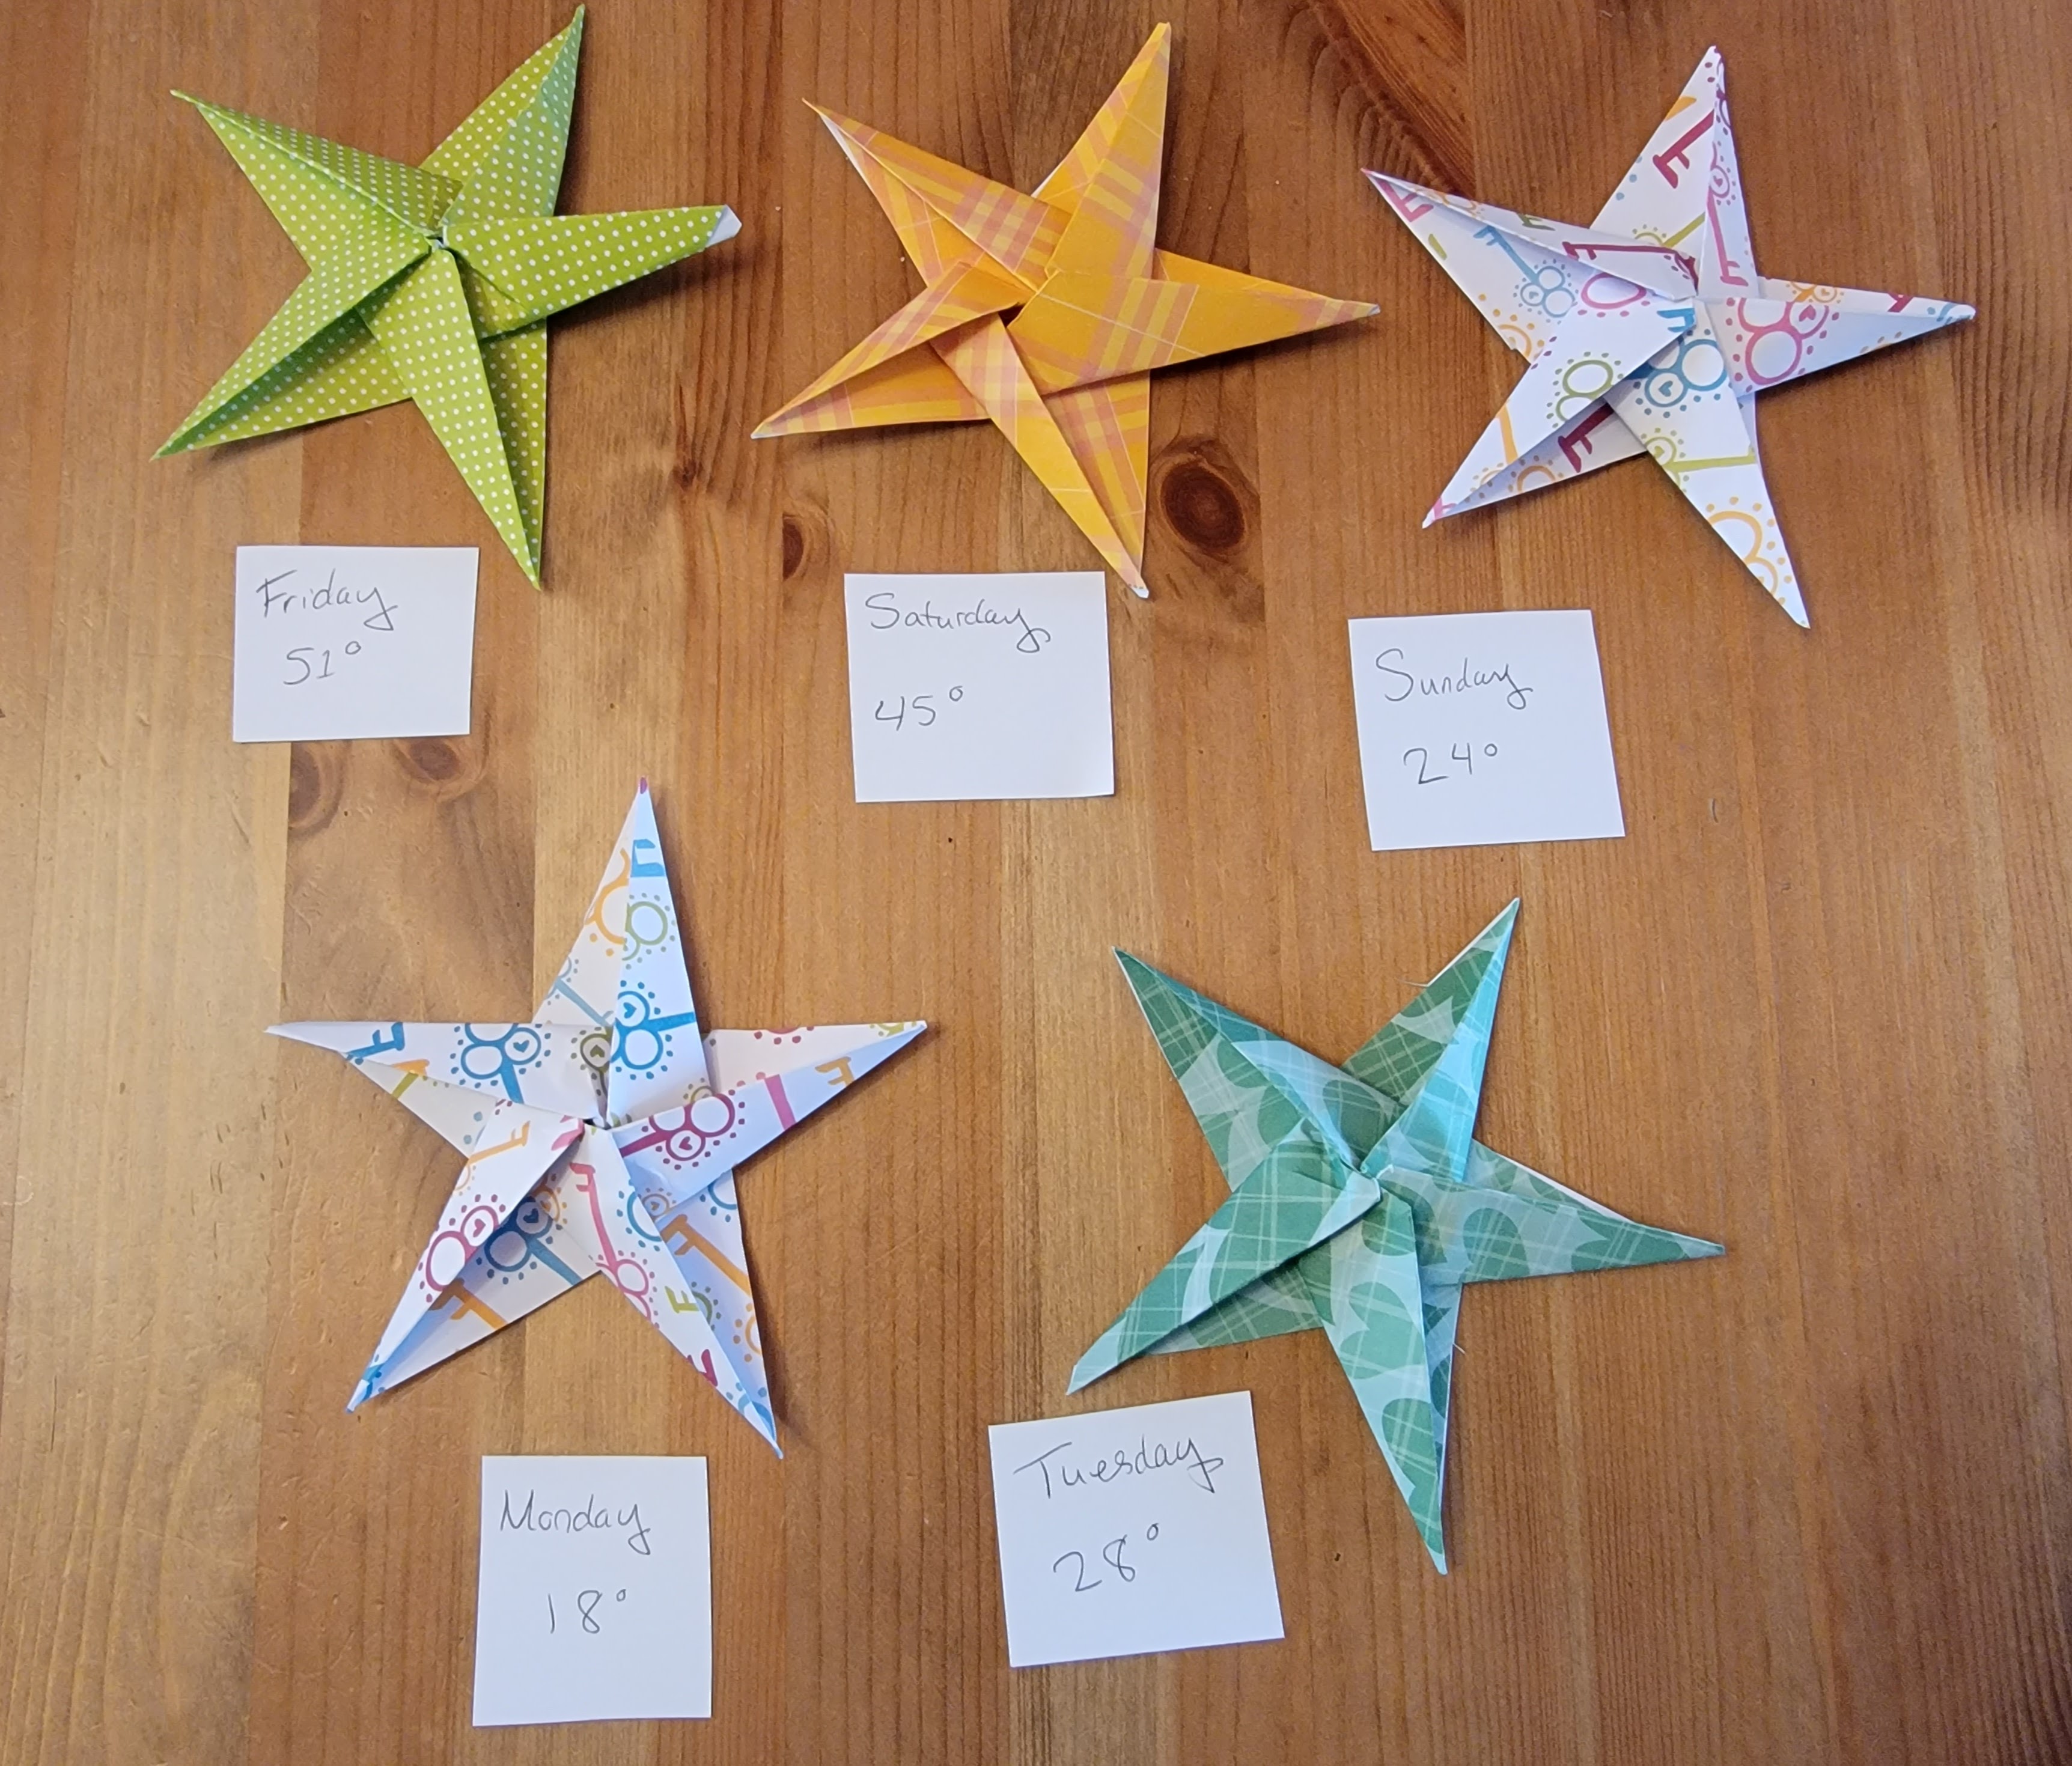
Example Craft: Paper Star Garlands
For this project, you can make paper stars for each day and string them together. Depending on the time you have, each student might make one star each day, or maybe three. This will also depend on the length of the project – if it’s a week, I’d suggest more than one each day, if it’s a month, one a day might be plenty.
Making Your Stars
Cutting out the stars: Decide on what paper students will be working with. For youngest students, cutting out stars might be a challenge in and of itself (if so, any shape will do!). Your students can draw and cut out their stars, or you can use these templates to cut out or trace on their own papers.
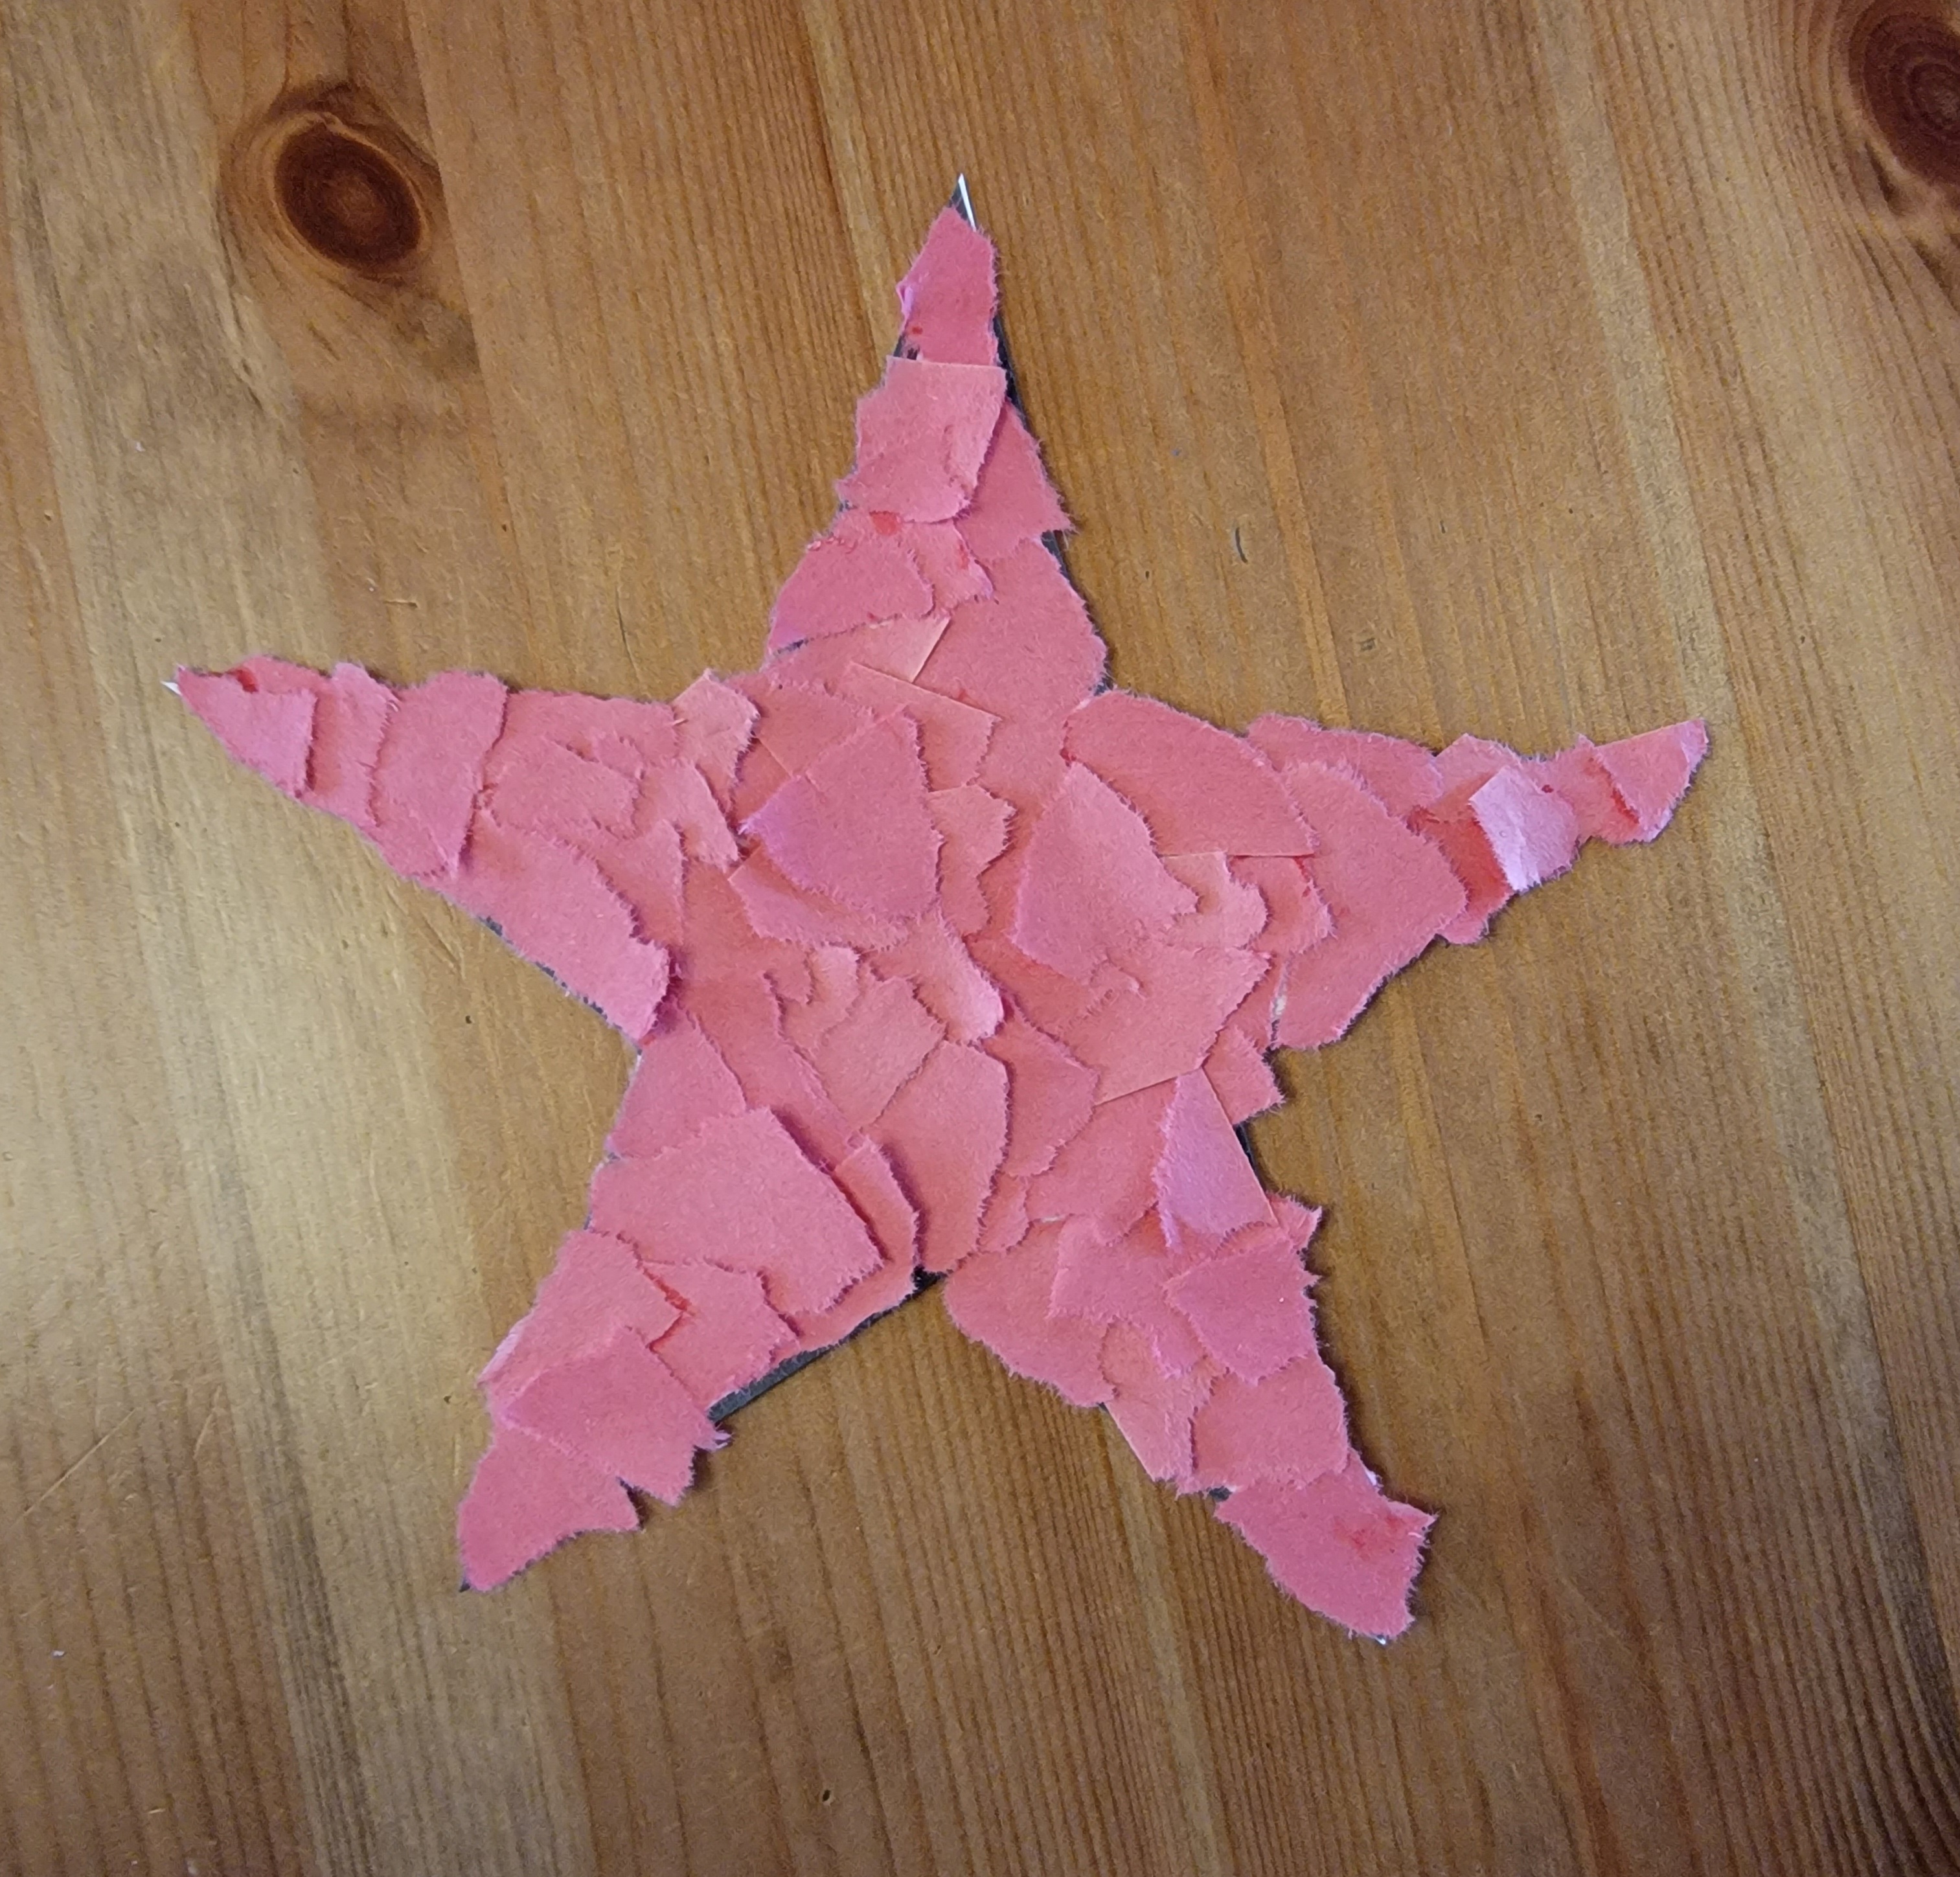 Adding the colors: Each session, students can decorate their stars with the color based on their thermometer. This could be as simple as decorating each one with markers or it could be a collage. You could even add glitter, if you dare! For the youngest students, tearing construction paper into small pieces and gluing them onto the shape is a good option (see the pink star photo to the right). If you have the supplies on hand, the way you decorate could change throughout the project.
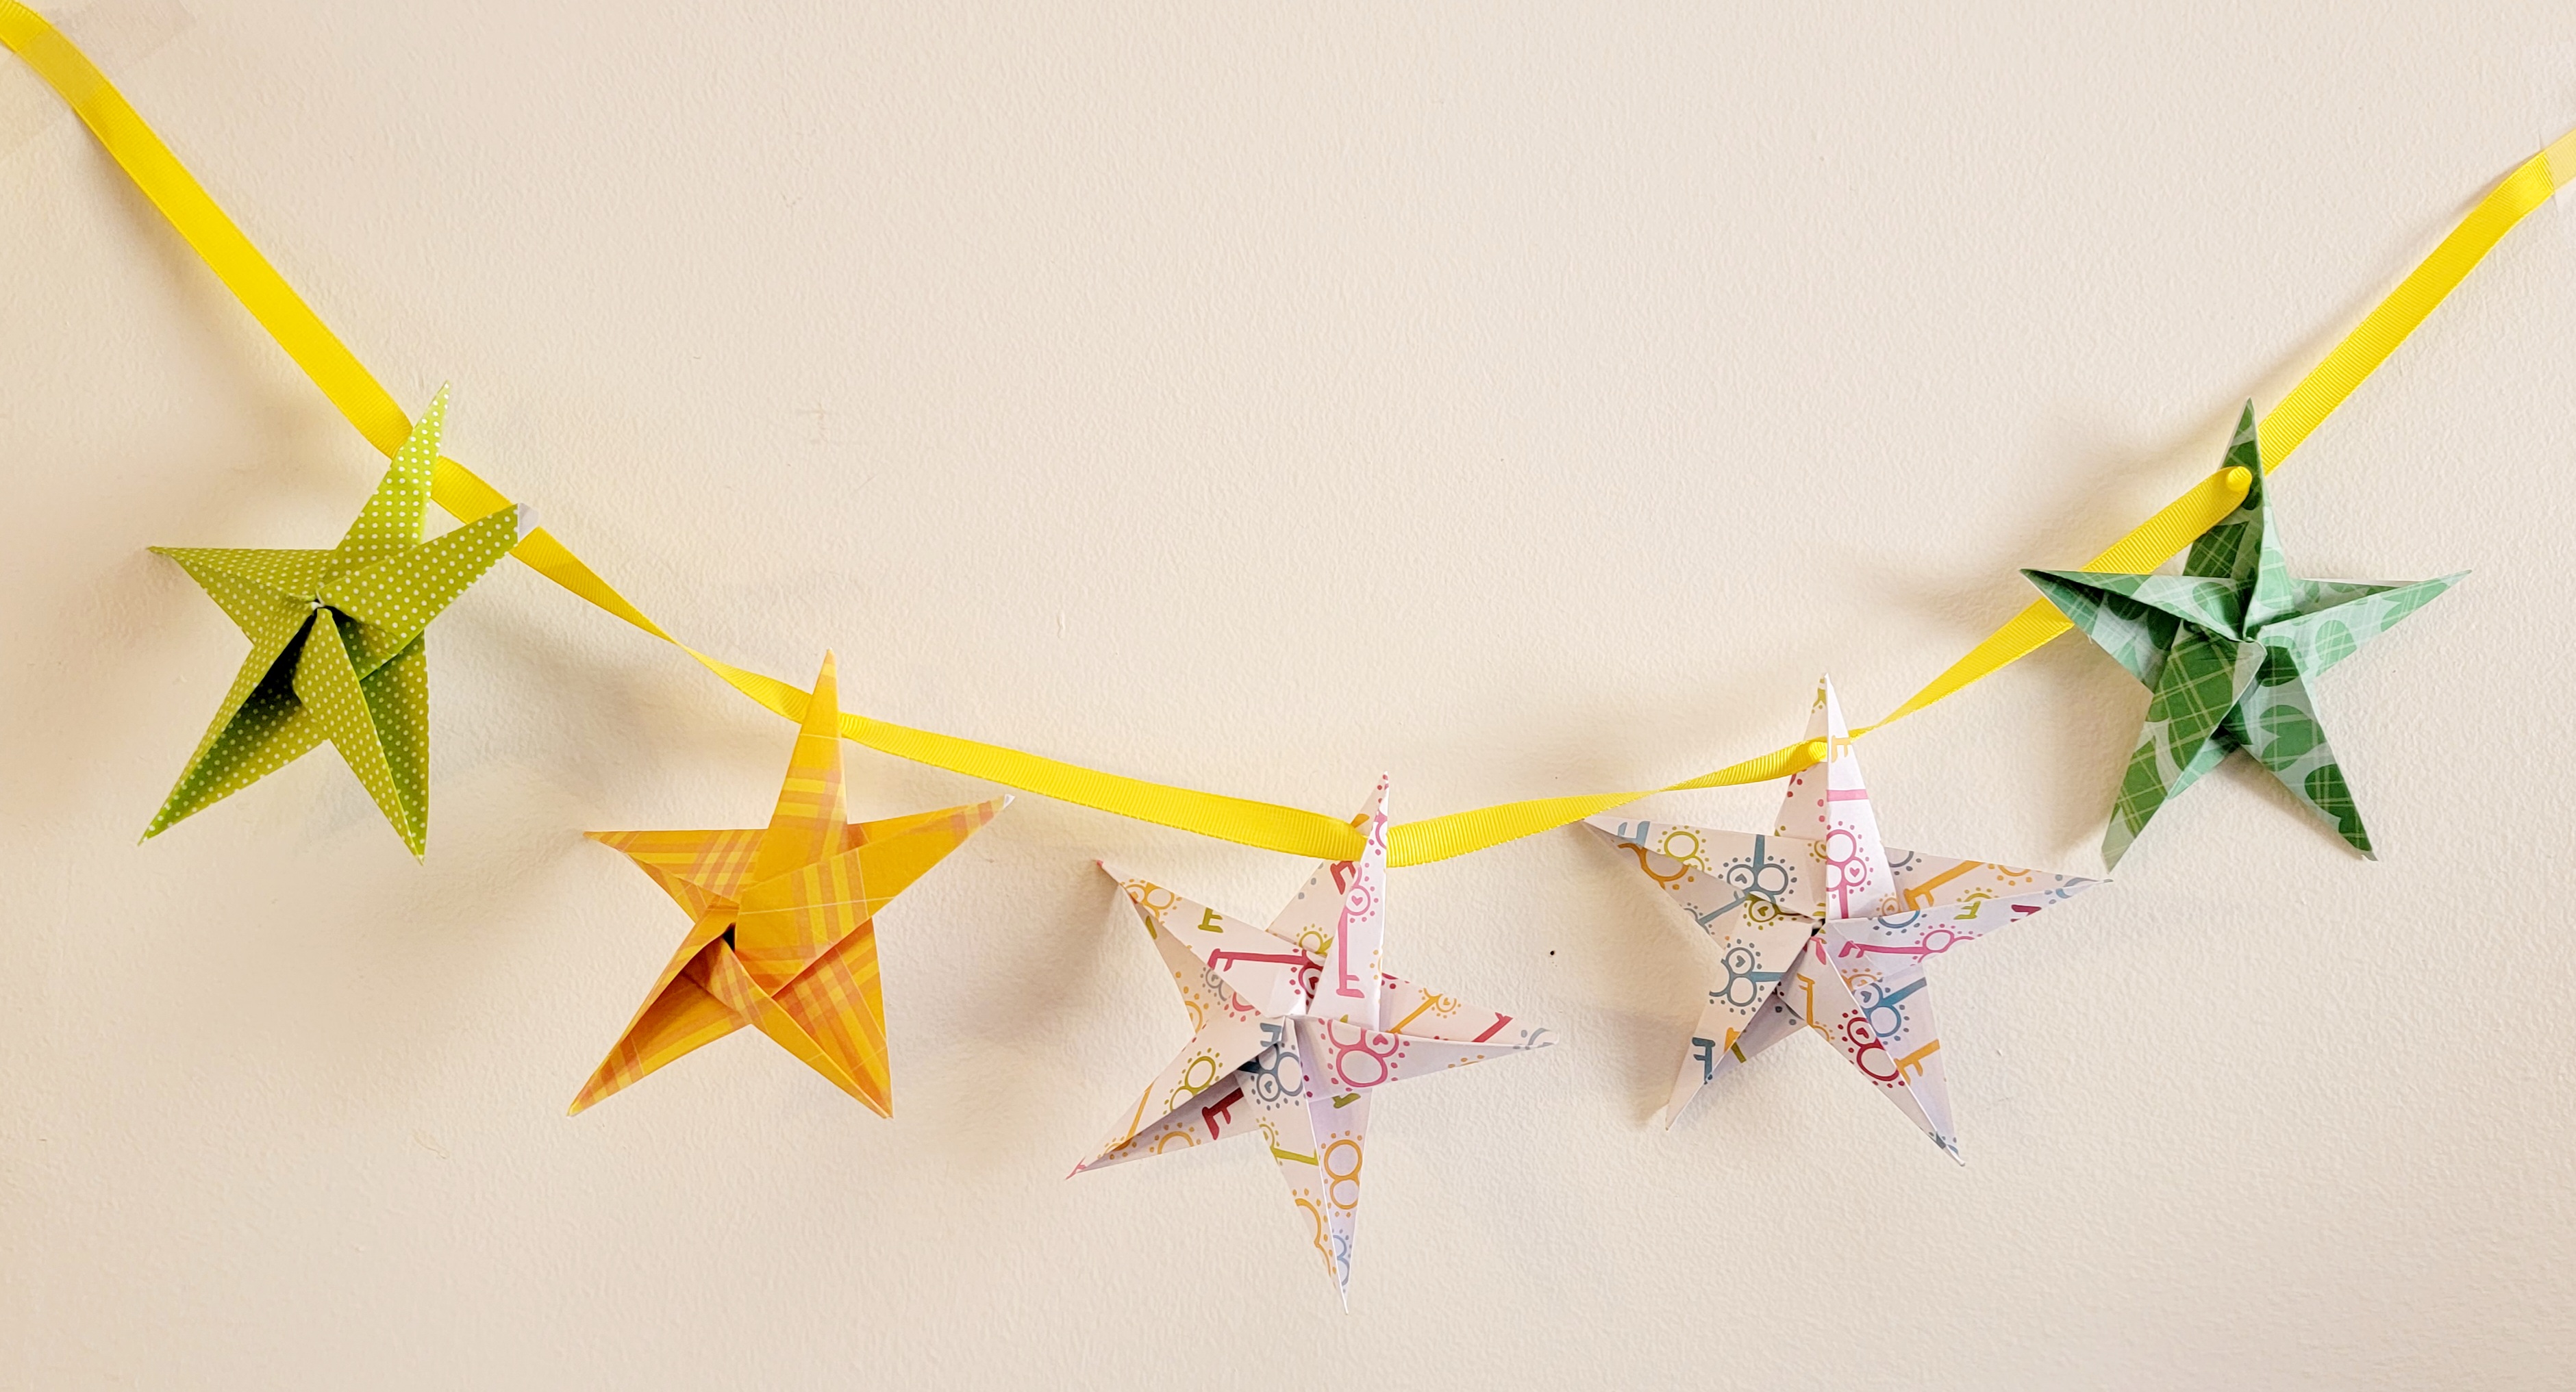
Stringing the stars: After the decorating is done (and the glue is dry!) you can use a hole puncher to make holes in each star and add it to a piece of ribbon or string. I’d suggest doing this after each session, so students can watch their garlands grow!
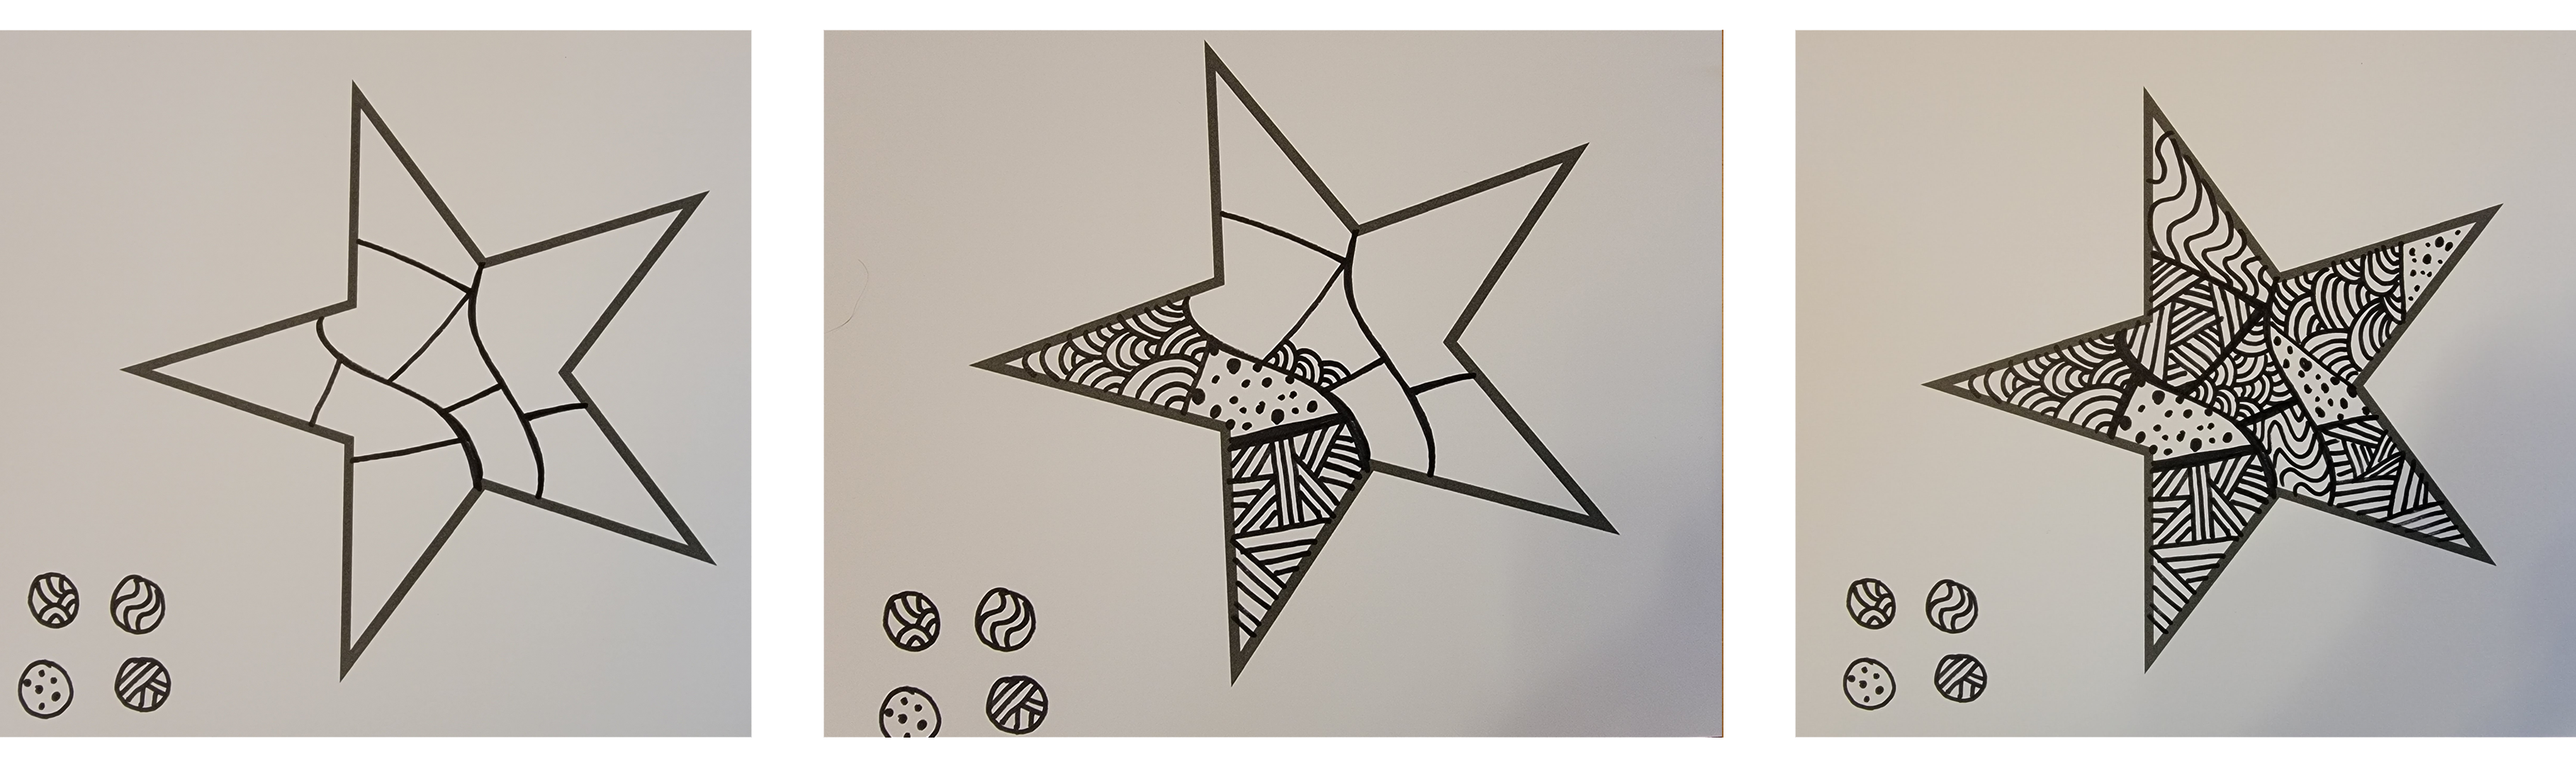
A note: If you’re drawing on the stars each session and students are struggling to think of ways to decorate them, consider introducing them to “zentangle” doodling. They’re simple patterns used in a repetitive manner to create amazing designs. Here's an example of a star where I used four different types of patterns (see the circles on the bottom left corner of the page) to decorate a star. The lines could be done in the color for the day, or the white space could be filled in.
For more examples of zen doodle patterns, check out Zentangle Art for Kids Project or Zentangle Doodling: 4 Steps.
Origami Stars for Older Students
You can complicate this by making origami stars, rather than cutting them out. See these instructions for a folded 5-point star. You can use this template for the stars, or have students measure out a hexagon to work with.
I’ll admit, this one can be difficult the first time around (the video helps) but once you’ve make a couple of stars, it gets easier.
Use different color paper each session (not cardstock), color the paper, or decorate the star once it’s folded. Colorful/patterned paper makes the project more fun. If you have paper with a pattern on one side, the patterned side should be facing down when you start folding your star.
Then, after each session, new stars can be strung on a piece of ribbon or string to create a garland. See pictures below for examples.